
DIY Fall Foam Craft Ideas To Make at Home!
Every time of year is a good time to do some DIY crafts, but something just seems a little different about fall time. Leaves are on the ground, there’s a chill in the air, and all you want to do is turn on your favorite fall movie and break out your trusty glue gun. We totally understand this sentiment! That’s why we’ve put together a few of our favorite fun fall foam crafts! (Try saying that five times fast.)
Decorating for the fall season is fun, but buying decorations can also be pretty expensive. As a result, many of us turn to making our own projects as an alternative. If you love DIY as much as we do, you know how fun and satisfying it can be to create your own one-of-a-kind décor and save money simultaneously! We’ve chosen foam as the base of these projects because it’s so easy to work with and versatile.
DIY Daisy Pumpkin
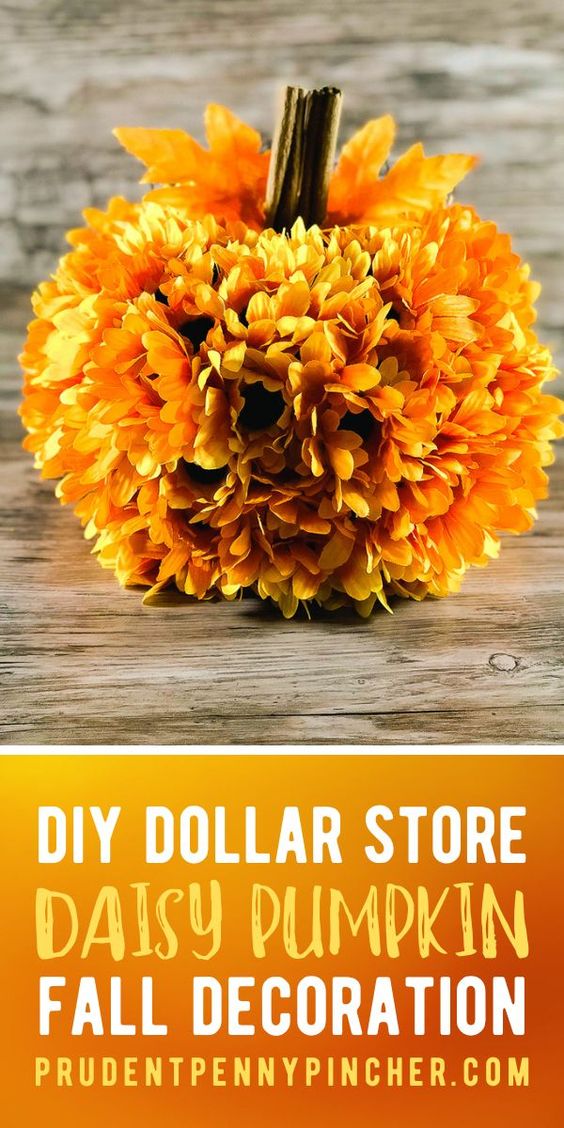
This adorable pumpkin craft is for people who love classic fall décor. For this craft, you will need the following supplies:
• Hot glue gun
• X-Acto knife
• Wire cutters
• Basic foam pumpkin, any size
• Silk daisies in your favorite color
• Silk fall leaves
• Cinnamon sticks
Start by carving a small hole in the top of your pumpkin with an X-acto knife where you would like the stem to be. It should be about an inch deep and wide enough to hold two cinnamon sticks. Then, prepare your daisies. If they have stems, clip them off about one inch down with your wire cutters, we’re looking for a very short stem. If your daisies do not have stems, then you may want to use straight pins to secure them to the pumpkin. Once your daisies are ready, start attaching them to the pumpkin. For stemmed daisies, press the stem into the foam, and secure with a small dot of hot glue. For daisies without stems, attach by sticking a straight pin through the center of the daisy and into the foam, and again secure with hot glue. Continue this process until your pumpkin is packed with daisies. (But be careful to avoid covering up the hole you carved for the stem.) Stick the flowers into the foam close together to give your pumpkin a full and voluminous look.
When the whole pumpkin is covered, and you are satisfied with the way the flowers look, take two autumn-colored leaves and attach them to the edge of the hole in the top of the pumpkin, like the leaves on a real pumpkin, with hot glue. Lastly, take two cinnamon sticks and secure them sticking straight up in the hole with hot glue. There you have it: an adorable daisy pumpkin!
DIY Fall Floral Wreath
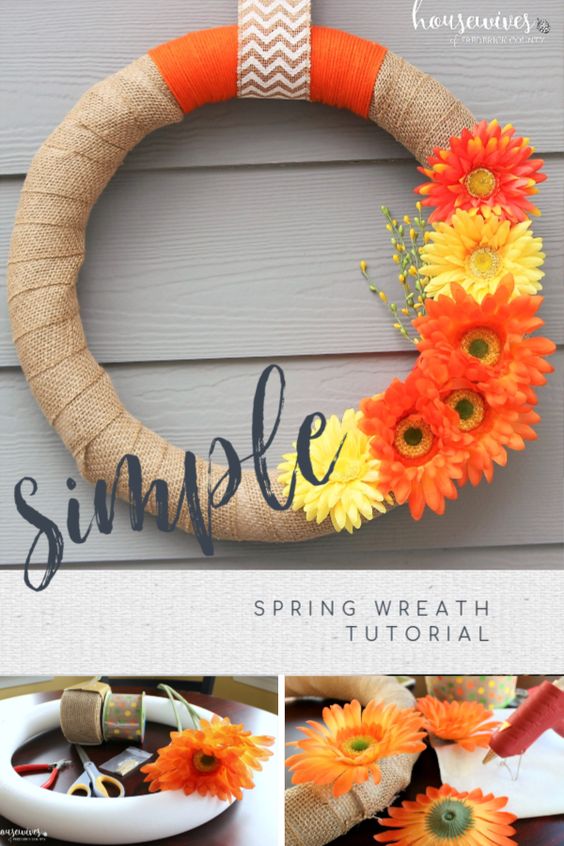
This lovely floral wreath is perfect for your front door, without the regular price tag! For this craft, you will need the following supplies:
• Hot glue gun
• Wire Cutters
• Bare foam wreath base, or make your own from any sturdy foam
• Burlap ribbon
• Orange yarn
• Fall ribbon of choice
• Silk flowers in red, orange, and yellow
Start by wrapping the entire foam circle in burlap ribbon. Wrap evenly, and secure periodically with hot glue. Be sure to secure the beginning and end of the ribbon well. Where the burlap ribbons begin and end, tightly wrap a four-inch long section in orange yarn. This will be the top of the wreath, where your ribbon hanger will be attached. Then take your silk flowers and trim them off most of any stems, leaving about an inch of wire left. Choose which side of the wreath you want to arrange your flowers on. We suggest the circle’s lower left or lower right for a lovely asymmetrical look. Lay your flowers on top of the foam to decide how you want them to be arranged. Be sure to incorporate different colors and styles of flowers. When you’re happy with your layout, start pressing the stems of the flowers into the foam and secure with a dot of hot glue. Continue adding flowers until you have covered about one third of the wreath. For the final step, take your favorite fall ribbon and cut a 12-inch strip. Thread it through the wreath and attach the two ends together with hot glue. This is how the wreath will hang on your door. Now you’re ready to enjoy your new fall front door look!
DIY Foam Halloween Candles
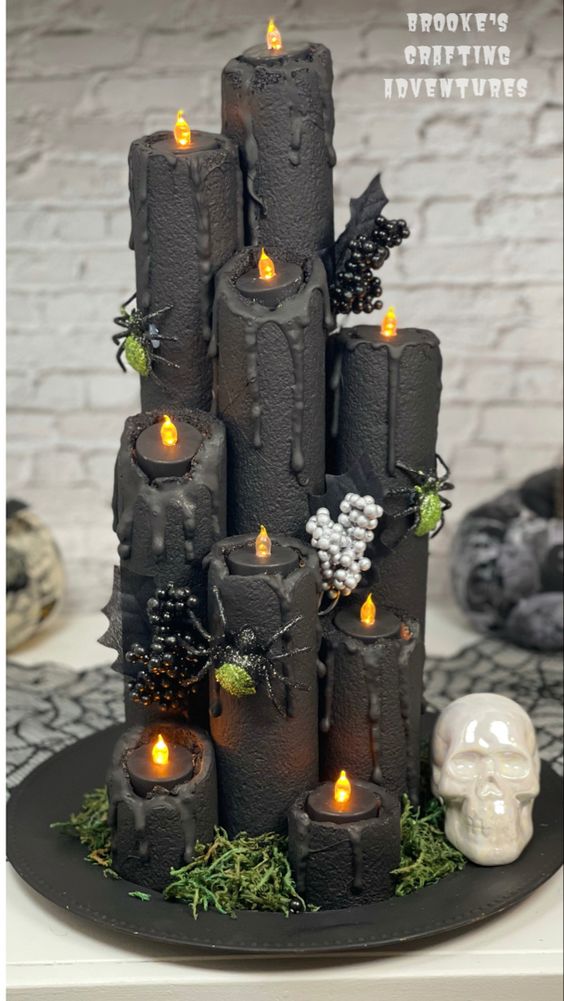
Now, if you want to get a little spookier with your fall décor, this is the craft for you! For this craft, you will need the following supplies:
• Hot glue gun
• Extra hot glue
• X-Acto knife
• Pool noodles
• Large plastic plate
• Electric votive candles
• Black spray paint
• Painter’s tape
• Plastic spiders
• Fake moss
• Black leaves and flowers if desired
Use an X-Acto knife to carefully cut your pool noodles into 9 or 10 sections of all different lengths. The longest section should be no more than 24 inches, and the shortest section should be no shorter than two inches. These foam pieces will be your candle sticks. Stand the pieces upright and decide how you want them to be arranged. For the best look, start with the longest pieces in the back and put the shortest pieces in the front. Start gluing your foam pieces together when you are happy with your arrangement. Use thin beads of hot glue and attach the pool noodles to each other, making them as secure as possible. Be sure that the base of the candle arrangement is flat and even, because the next step is to attach it to the plastic plate. With a large amount of hot glue, secure the candle arrangement to your plate. Then check to see if the candles will fit into the holes in the tops of the pool noodles. If the holes are too small, use the knife to make them just wide enough for the candles to sit in.
Now it’s time to add wax drippings to the tops of your candles. Drip hot glue down the tops and sides of the candles to mimic the look of dripping wax. Go ahead and be as messy as you like. While you are waiting for the wax to dry, take your votive candles and use painter’s tape to tape over the little flames to protect them from the spray paint. Now it’s time to head outside. Take a can of black spray paint and completely cover every inch of the candles, the glue wax, the plate, and the bases of the votive candles. Leave this to dry for a few hours.
When the spray paint is completely dry, bring your candles back inside to finish assembling your decoration. Take the tape off the votive candles and set them on the tops of the candlesticks. Then, decorate the plate and the candlesticks with your moss, spiders, and any other decorations you desire, including spooky leaves, flowers, or skulls. Voila! A very spooky centerpiece!
We hope you enjoy making these fun and festive fall foam crafts! All of the supplies you’ll need can be found at your local craft store, but for the foam, look no further than Foam Factory, Inc! Happy crafting and happy fall!
Leave a Reply