
DIY Foam Fall Pumpkins
Pumpkins aren’t simply for Halloween but have become a beloved staple as well as flavor for the entirety of fall as well as Thanksgiving. This colorful fruit—or vegetable if you prefer—went from regular squash to an American icon. Whether carved and lit from within to thrill or chill trick or treaters or spice-infused, creamy orange filling inside of a crisp flaky crusted pie, there’s no denying that pumpkins simply embody the autumn season.
This Thanksgiving if you’re stumped on what sort of beautiful fall-themed items to decorate your home or gathering with, there’s no way to go wrong with DIY foam fall pumpkins! The choices on how to decorate them, whether leaving them beautiful orange or decorating them with other natural colors or, using a myriad of fall-themed fabrics and paints is all up to you. That makes this DIY craft easy and perfect to fit in with any décor you may already have or have planned to use for your family feast!
Cinnamon Scented No-Sew Fabric Pumpkins
The warm scent of cinnamon on a cool fall day along with the fun visual of a fabric pumpkin might be the right homey touch to decorate this Thanksgiving table. These no-sew fabric pumpkins are easy to create so if you’re running out of ideas or want something last minute, or just something that won’t take up a lot of time—these will be perfect.
Supplies to Have on Hand
Before you start with your creative ideas, there are a few crafting items to have on hand to make these DIY foam fall pumpkins
- Any fabric of any kind you like. Can be cotton or lightweight upholstery. Fat Quarters work well (A fat quarter of fabric is one-fourth yard cut that usually measures about 18” to 22”. Fat quarters can be created by cutting a half-hard of fabric 18” along the lengthwise grain and then cutting that piece in half at its midpoint).
- Foam stuffing. Depending on your preferences, you can use shredded conventional foam, shredded dry fast foam (if you might be placing them outside), or even scrap polyurethane foam
- Some Ziplock bags
- Thread or twine in any color you prefer
- Cinnamon sticks
- Rubber bands
- Fragrant items to mix with stuffing
Instructions
- Place the foam of your choice into a small, sealable bag. If you would like to, feel free to sprinkle dried lavender or other scented items within the bag at this time.
- Spread the fabric you will be using on the right-side (pattern or color side) down and place the bag with stuffing in the center.
- Take 3-4 cinnamon sticks and wrap a rubber band around them, then place down into the center of the bag with the stuffing.
- Take a corner of your fabric, and stuff into the rubber band. Repeat this with each corner until the bag in the middle is hidden to your liking.
- Tie a piece of twine, ribbon, or string around the cinnamon sticks.
That’s all there is to it! An easy, no-sew, no glue, wonderfully scented DIY foam fall pumpkin.
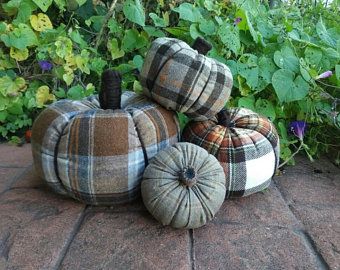
Repurposed Knitted Material DIY Foam Fall Pumpkins
This cozy DIY pumpkin will require a bit of hand sewing, but nothing too complicated so it should be beginner-friendly. The fantastic thing about this craft is that you can use any knitted material that looks like a sweater, or pieces of an old sweater to repurpose it for a fun fall decoration. Use that old sweater sleeve, use a knitted sock, or even an old winter hat you no longer wear.
Supplies to Have on Hand
- Old, knitted socks, winter hat, or a sweater
- Wine cork
- Dental floss or twine
- Foam stuffing of your choice such as shredded or scrap foam
- Rubber band
- Sewing needle
- Thread
Instructions
- Gather your chosen knitted fabric, whether it is a sock, a sweater, an old hat, or sweater sleeve.
- No matter what knitted object you choose, cut the foot off the sock, or the sleeve from the sweater, or a hole at the top of your old winter hat.
- For the sock or sleeve: thread your needle and sew a gathered end to the hole or bottom of the knitted material, pull tight, and tie it off. (You can gather material by tucking, punching, or folding small sections of fabric and using a stab motion with the needle to pierce many of these at the same time).
- Turn the sock or sleeve inside out and you should see what looks almost like a belly button, which lets you know you’ve gathered the fabric.
- Use your preferred foam stuffing to stuff the knitted material, but not too tightly. You’ll want to leave space for a pumpkin stem or top.
- Wrap your rubber band around the cork and place the cork in the middle of your foam stuffing. Begin picking up the fabric and stuffing the edges of it into the band around the cork until the stuffing is encased.
- Thread your needle with the dental floss and simply sew from the bottom to the top of the pumpkin to help shape and create the sections of a pumpkin.
- Tie the floss tightly to the bottom of the pumpkin.
There you have it! You’ve made yourself a foam fall pumpkin that will no doubt bring a warm, autumnal, and Thanksgiving touch to your home and table.
These foam pumpkin DIY’s can be as cute or as traditional, as classic, or as sophisticated as you want or need. Since they use affordable items and are relatively easy to craft, they won’t take up too much of your time or your budget either while being a relatively fun project and depending on how much you love them—can be a decorative aspect in any room for years to come. Of course, they are no doubt as easily taken apart if no longer needed and the foam stuffing can be used for so many other crafts or home needs.
Leave a Reply