
DIY Foam Puzzles for Kids
Puzzles are a fantastic means to help the brains of young children. They teach kids about the concept that, sometimes, parts are needed to make a whole. Each piece of the puzzle is just a tiny fraction of the full picture. Puzzles also assist toddlers in developing essential skills such as shape recognition, concentration, goal setting, patience, and a sense of achievement—these basics are an excellent foundation to prepare children for school.
Additionally, puzzles are great for hand-eye coordination and fine motor skills. Puzzles, importantly, also teach and test critical thinking, judgment, visual-perceptual skills, and memory. For larger puzzles, sometimes our kids invite their friends to help them with the challenge, which teaches them teamwork and communication. Last but never least, puzzles are fun!
So if you’re interested in engaging your little ones, here are some of the top DIY foam puzzles that kids are sure to love!
Craft Foam Window Cling Puzzle
This straightforward DIY puzzle is perfect for kids to play with, especially ages 2-5. You need colored craft foam (Crosslinked Polyethylene) in your choice of colors, a good pair of sharp scissors of a sharp utility knife, and a flat cutting surface.
To create these puzzles, use your imagination to make various shapes, such as a circle for the sun and triangles for the rays or a flower with petals, stem, etc.
Once the shapes are all cut, and the scissors are put away, grab a bucket of water and find a flat, smooth surface to let them play on. To get the craft foam to stick without using harmful adhesives, dampen the pieces first, then press them onto a smooth, non-porous surface.
There you have it! This is a creative puzzle that is perfect for rainy days and simple to make for quick enjoyment!
Foam Board with Pictures Puzzle
This puzzle is another easy DIY where the supplies are minimal and affordable. You may even have some of the things needed already in your home. This puzzle is excellent for ages 5 and up, depending on how complicated you wish to cut it.
Supplies:
- Children’s books, posters, or printed out photos on copy paper
- Craft glue stick (so the paper doesn’t wrinkle)
- Sharp craft knife
- 1” thick polystyrene foam.
- Pencil
- Optional: Mod Podge and a sponge brush.
How to:
- Use your craft glue stick to glue the image onto your block of foam. Smooth out gently.
- If needed, trim carefully around the edges to remove roughness and even the board.
- Take your pencil and lightly draw out the shape of your puzzle. You can choose to go the traditional jigsaw puzzle shapes or any shape you think your kids will enjoy.
- With your utility knife or craft knife, begin to cut along the pencil lines you drew carefully.
- This step is optional, but if you like, you can use a sponge brush to seal the photo used, ensure the paper sticks evenly, and prevent paper lifting by coating each piece with Mod Podge. Note that Mod Podge is safe for children to handle after it dries, but not food safe! Meaning this puzzle is not suitable for a very young child.
- Once the Mod Podge is dry; your DIY foam puzzle is ready for playing!
Foam Rainbow
This DIY puzzle is straightforward to make and lots of fun for teaching the colors in a rainbow.
- Lay out your Crosslinked Polyethylene foam in order of the rainbow: red, orange, yellow, green, blue, indigo, and violet (or something close).
- Draw lightly or cut out a large half-circle in the red foam.
- Draw a slightly smaller half-circle, roughly 1 inch or ½ smaller in the orange.
- Repeat this process of drawing smaller half circles until the last color.
- Kids can then pile the colors together to create their very own rainbow!
Foam Button Snake
Help them learn to button things by building them a fun button snake!
Supplies:
- Color foam in colors of your choice
- A ribbon
- Two buttons
- Sewing thread and needle
How to Make:
1. On your piece of ribbon, sew a button at each end. Don’t worry if you don’t know how; it’s straightforward, and there are lots of great tutorials to help!
2. Cut various shapes out of your Crosslinked Polyethylene foam. They can be circles, squares, clouds—whatever you like.
3. Make a slit large enough in the middle of your shapes for the buttons to slide through.
4. Let your kids create colorful button snakes by adding the foam to the ribbon!
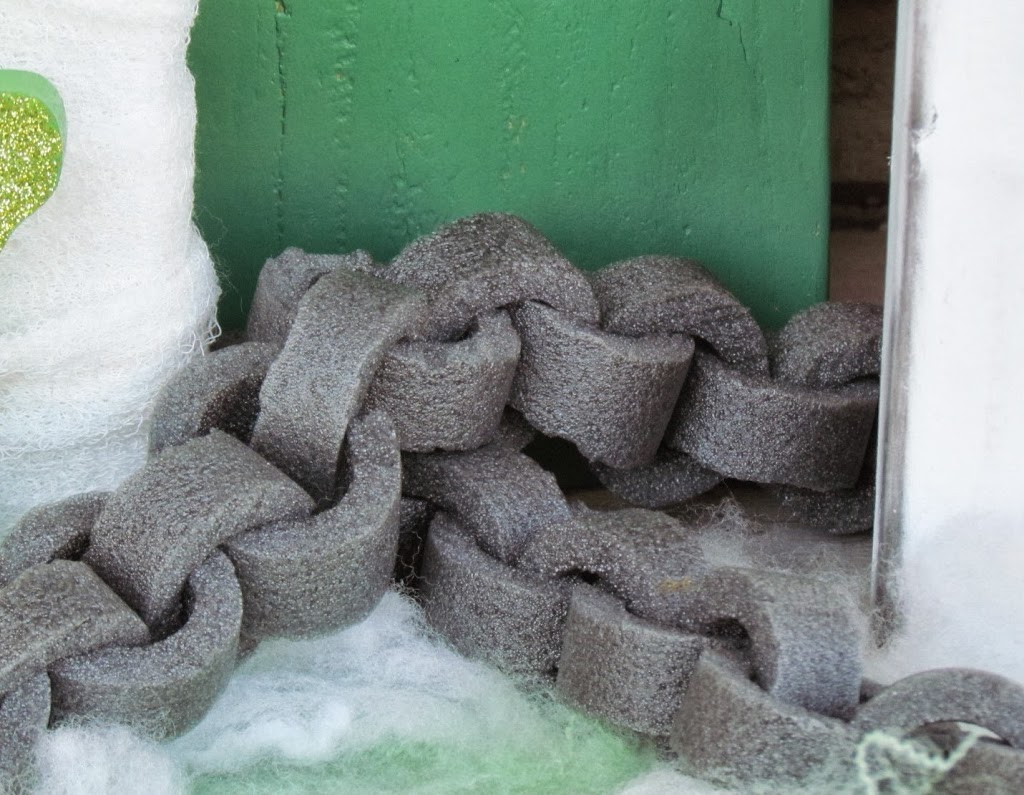
Foam Chain Building
With leftover scraps or the colored Crosslinked foam, you can create pieces that allow your little one to build a chain. Instead of using and wasting paper, tape, or glue, a bit of foam with easy Velcro dots stuck to them can be taken apart and built over and over again.
Supplies:
- Colored Crosslinked Polyethylene foam
- Velcro stick-on dots
- Utility or craft knife.
How to Make:
- Cut your foam into strips roughly 1-2 inches wide.
- On one end of a foam strip, place a Velcro dot.
- Flip the strip over and add another on the opposite end.
- Test to make sure it works. You should be able to roll the foam strip and stick the Velcro pieces together.
You will find that there are many ways that foam can enrich our lives through learning and creativity. Foam Factory offers custom cutting services that can help make some engaging puzzles to help!
Posted in DIY
Leave a Reply