
How to Make a Cosplay Piece of Armor
As a cosplayer, you know the excitement and sense of satisfaction when your costume comes together perfectly. When you create a character, all the elements need to be accurate to the depiction of the character, including their armor. The matter of how to make a cosplay piece of armor out of foam may seem intimidating, but it is easy for even a newer cosplayer. Let’s take a look at the steps to help you create the right outcome for the character.
Step 1. Know the character
The first step in how to make a cosplay piece of armor is to know the character you are portraying. There are different types of armor worn by common cosplay characters and they may differ. For example, one character may just have armor on the chest while others have armor on the chest, arms, and legs. Once you have your desired character chosen for the event, you can see what types of armor you will be creating since this is important in determining how many supplies you will need to purchase.
Step 2. Gather the necessary supplies
Once you know your character and the armor they wear, you can start assembling the supplies. You will need items such as a pen or marker, pencil and tracing paper, a sharp blade to cut the foam, a heat gun or hair dryer, measuring tape, a hot glue gun or fabric glue, and any paint needed to create the desired look for the character. You will also need the foam for the project which should be a foam that is soft enough to be molded with heat so a thermoforming foam is a good choice. While it is easier to find the foam in the same color as what you need, it can be painted to match the character as needed.
Step 3. Create the design/take measurements
After you gather all the necessary supplies, the next step in how to make a cosplay piece of armor is to create your design. While you may be able to find a pattern online or from a cosplay buddy, chances are you will need to sketch it for yourself. Using the tracing paper and a pencil, you can sketch out the elements of the armor related to the character. Keep in mind that you will likely end up with multiple sides you will eventually glue together to create the more 3D end result you wear. This is the first sketch of the general outline of the design, but you will also need to take measurements to get a more specific sizing guide. Most cosplayers creating their own armor go through several sketches before reaching the final one they cut into the foam. Using a tape measurer meant for sewing, measure the area where you will wear the armor such as the length of your arm or the width of your chest. This will help you get the sizing right as you continue your sketching process.
Step 4. Transfer the design to the foam
After a few practice sketches and adjustments made to ensure proper fit based on the measurements, you will want to transfer the design from the tracing paper to the foam. You may be able to do this with just the tracing paper and the foam, but many people use a poster board to create a template that is easy to work with and allows for better control. Using a marker or pen, simply trace the outline from the tracing paper onto the poster board and then cut the outline out from the poster board.
Step 5. Cut foam
Next, you will place the poster board template on the foam and start cutting. Using a sharp blade such as an Xacto knife or razor blade, cut out the pieces either by tracing the pattern of your template or the markings made with the tracing paper and pen. Keep in mind that you will most likely need to duplicate certain pieces such as when creating armor for the arms or legs to get the 3D effect you are seeking for the character.
Step 6. Mold it with heat
When working with foam to create this type of costume element, you need to make sure it will fit against the body the right way. Foam can be contoured to the body using the application of heat applied directly to the material. To mold the foam, you will want to apply heat to the foam, bend it in the shape you want, and then hold it until the foam takes on the desired shape. It is important to use low heat to start and keep the heat gun or hair dryer a safe distance from the foam. You want the heat to mold the foam, but not melt it completely. Once the foam is in the molded position, it should stay in the desired shape. If the foam isn’t getting warm enough to make it pliable, try a higher heat setting but pay attention for any burning smells or melting of the material.
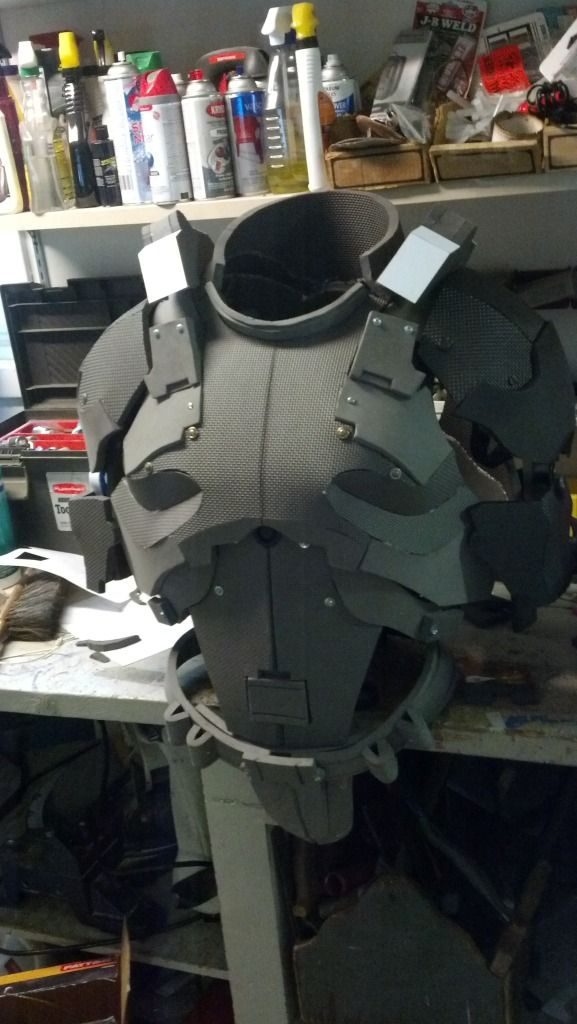
Step 7. Glue on pieces as needed
Most armor will require some assembly, and this is where your glue gun or fabric glue comes in to help. Once the pieces are molded the way you need them, you can start gluing the corresponding duplicates together such as the two sides of the arm or leg armor, or the back and front of the chest plates with their overlapping shoulder straps. Make sure that once you glue the pieces together, you give the glue plenty of time to dry before moving on to the next steps.
Step 8. Paint foam
Next you will paint the foam to the desired color. While you can certainly spray paint it, you can also brush paint it in the desired colored according to your preferences. If you are working with spray paint, make sure you paint in a well-ventilated area. Paint the pieces according to the color specifications of your particular character, make sure the armor is completely dry before you put it on, and now you have your very own foam armor!
Posted in DIY, DIY Cosplay
What glue do you recommend for gluing the heated/shaped foam?
Can such foam’s edges be sanded cleanly without fraying little bits?
The 3M Super 77 spray adhesive can be used for closed cell foam. Cross linked polyethylene foam can be sanded to shape.