
DIY Your Gun Case for a Perfect Fit
When it comes to transporting your gun from point-A to point-B, there is nothing quite as important as well-fitted and nicely padded gun case. What most people see as a barrier here is that it can seem money and time consuming to get it just perfect for your exact specifications. Believe it or not, getting a gun case to your specifications is actually a lot easier than you might think. Take a look at our DIY instructions below to achieve exactly what you are looking for!
Items to Gather:
Before starting any project, it is crucial that you make sure and have all the needed items ready to go before you start the project.
- Hard gun case
- Charcoal Foam from Foam Factory, Inc.
- Poster Board (if you don’t want to use your gun to draw your cutouts)
- Sharpie Marker
- Electric Carving Knife or Sharp Serrated blade
Steps:
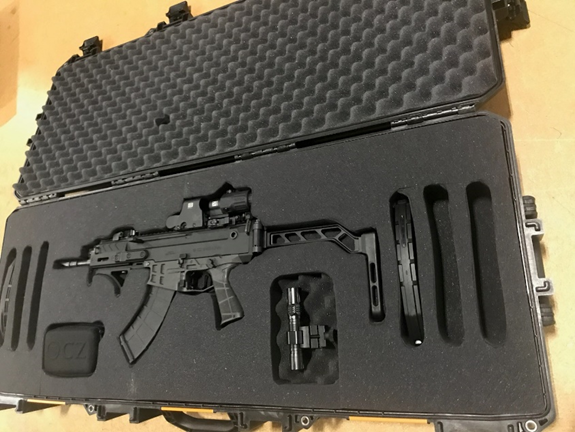
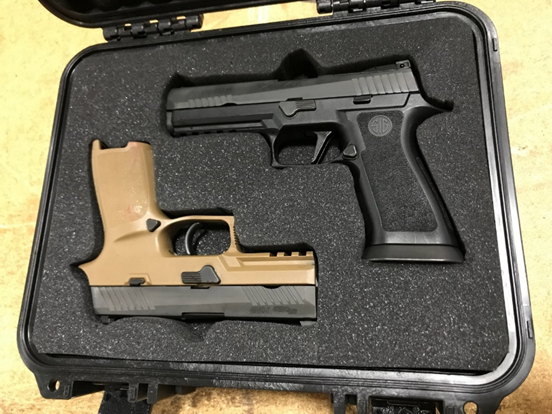
- After you have gathered everything you need for the project; it is time to move on to one of the most important steps: laying out your parts on the foam exactly as you want them cut. You can do this with the guns and accessories themselves, or with cutout templates, which can sometimes be easier to trace.
- When you have everything laid out on the phone exactly how you want to cut it, you can begin tracing the outline of these parts with your Sharpie. Be careful, though! Any mistakes here could be costly, because it could cause you to cut the wrong shape. If you are using posterboard or some other template to trace, then using pins to hold them in place can help you trace accurately and avoid mistakes.
- This step is likely the most critical of all! It is now time to cut your foam. To get the feel of what it is like to cut this foam, it is always wise to cut on a practice piece first so as to not make mistakes on the final parts. Once you are comfortable with whatever cutting tool you are using, you can begin cutting into the gun case foam along the Sharpie lines. Be careful to move slowly to avoid mistakes.
- When you have completed the cutting process, it is time to make sure everything fits how you would like it to! If needed, you can carefully trim any rough edges for aesthetic purposes, but be sure not to cut into the all-around cut. If there are still visible marking from the Sharpie, you can wipe these off with alcohol until they are clean. If everything fits, and it looks the way you want it to, then that’s it!
Alternatives:
If the above DIY project still sounds like it may be a little too time consuming for your schedule, there is an alternative option! Here at The Foam Factory, we also sell Charcoal Pick and Pull Grid Foam. This foam comes in a grid of perforated squares that can be picked and pulled out in whatever way you need to fit your gun and accessories. Although it may not fit every rounded corner and edge perfectly, it will come close, and save you time in the long run.
Whichever path you take, The Foam Factory is happy to provide you the Packaging Foam that you need for your project. If you want more information on this project or what else The Foam Factory has to offer, feel free to Contact Us directly, and we are always more than happy to help!
Posted in DIY, Foam Packaging
I have cut open cell charcoal foam for gun cases with a hot wire cutter with good success. I would like to try some XLPE foam in some cases. Can I use the hot wire method for that foam? If not, what other method(s) could I use for good clean detailed cuts?
We do not suggest hot wire be used for any foam types except for polystyrene foam. Any other foam types, you will need to try at your own risk.