


Supplies Needed to Complete This Task
You will need your new foam-only or fiberfill wrapped cushion and its cover.
Preparing Your Cover for the Foam
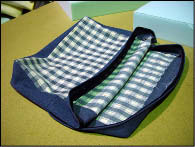 While your cover is likely empty after removing the old foam to record measurements, make sure no remnants or debris are hiding within the cover. Since this may be the only time you ever have empty cushion covers, this is an excellent opportunity to wash them. Ensure the covers are able to be safely machine washed and dried if you elect to use those cleaning methods. If you do decide to wash your cover, be certain that it's completely dry before stuffing it with your new cushions. If you're replacing marine foam cushions check the cover's interior for mildew or mold. When you're ready, unzip the cover and lay it on a flat surface, with the opening facing you.
Inserting the Foam Into the Cushion
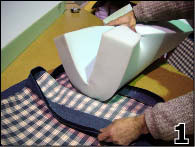
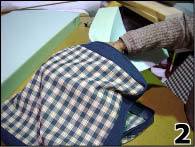
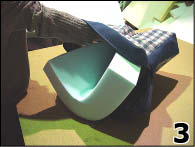
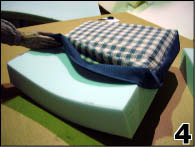
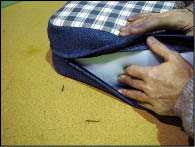
To insert your new cushion into its cover, fold the sides of the foam together long ways and facing up, as shown in picture 1. If you're unable to do this, you can also use a wide belt to carefully tighten the foam together in this position. Once folded, work the foam into the cover as in picture 2, until it reaches the front of the cover, seen in picture 3. Release the foam, and it will flatten itself within the cover as much as possible, as shown in picture 4.
NOTE: If you need to synch the foam together with something, be sure not to use thin rope, twine, shoestrings, or anything else that can slice into the cushion. If you don't have a belt, 2" wide packaging or duct tape wrapped with the sticky side facing out is broad enough to keep from cutting through the foam. This strategy can even be used to fit a mattress replacement through a doorway or hall.
Smoothing the Cover
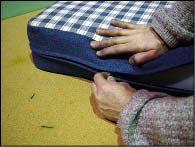
 Once the foam has been inserted, the cover will need to be smoothed out over it. The goal is to get the seams of the cover to line up with the edges of the foam, as shown in the picture to the right. There is no special technique to accomplish this, just careful manipulation of the foam and cover until everything is in position, evening out wrinkles as they appear.
Closing the Cover
Once the foam is fitted within its cover, it will still be bulging out of the zipper opening slightly. This is a good thing, as that extra foam means the cover won't be loose and the cushion will look full and inviting. Just gently push the foam into the cushion as you zip over it. If you cut and measured correctly, it shouldn't take much effort to fit the foam in behind the zipper.

Final Results
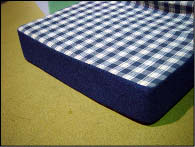
Once the cushion is zipped shut, it should look crisp and full. Seams should line up with the cushion's edges and the foam should expand against the fabric, eliminating any wrinkles unless the cover itself is worn out. Now that you've completed your chair pad, seat back replacement or cushion, toss it where it belongs and enjoy – Great Job!
Previous: For fiberfill cushions Apply Fiberfill Wrap to Your Cushion
Previous: For foam-only cushions How to Cut the Foam for Your Cushion